- Have any questions?
- +88 01799-646582
- hello@cutoutway.com
How to remove clothing wrinkles in photoshop | Best photo retouching service for cloathing

How to remove an object from a photo in photoshop| GIMP | Best tips and tricks for beginners
November 1, 2021
How to Make Change Background Color in Photoshop CC 2021
November 13, 2021How to remove clothing wrinkles in photoshop| Best photo retouching service for clothing
Read how to remove clothing wrinkles in Photoshop and achieve natural results. Fast and easy way of removing wrinkles from textures. Get the best photo retouching techniques.
How to remove clothing wrinkles in photoshop
Wrinkles mean curves or holes. As an e-commerce business owner or clothing/online seller, you need to know how to remove clothing wrinkles in photoshop tools and how they help you remove them.
As an e-commerce seller, you know well how products impact your products and how to grow your sales on an online platform. Product photos impact your sales if it’s not good to edit. You should attract your buyer with your products in their eyes to buy products easily seen at a glance.

If you are a clothing seller, then it’s a matter to know appropriately how photoshop works for your clothes product and how properly you remove clothing from any cloth photo. You don’t like to showcase your clothing products to your customer in the same way. Your clients never want to see the products with wrinkles, so you need to edit the photo at first and post or sell your clothing products to your buyer.
To display your photo wrinkle-free, you need to edit the photo using photoshop. Removing clothing wrinkles is not accessible if you do not have proper knowledge about advanced photo retouching. You need to apply a lot of editing processes to finish the job.
Today I’m going to show you easy tricks and tips on removing wrinkles from clothing and the best way to remove wrinkles from cloth. I have described erasing wrinkles from the clothing photo.
Remove clothing wrinkles
Here I describe how to remove clothing wrinkles in photoshop by applying the tips and tricks.
Open the photo and create a duplicate layer.
Open the clothing photo with adobe photoshop that you need to remove wrinkles. After opening the image, you need to go to file>open. Also, you can open a by dragging and dropping with photoshop.
After that, make a duplicate layer of the photo. It teaches you to edit the photo in a non -destructive way. Use CTRL+J to create a duplicate layer of the clothing photos.
Create a curves adjustment layer
You need to adjust the curves layer to enhance the clothing color. Generally, the curves layer helps you to adjust the color range of the photo. You can make an adjustment layer by clicking on the curve’s icon from the adjustment panel. You can create a curves layer by going to the below option.
Layer>New adjustment layer>Curves
In this way, you can create a new curves layer and, after that, need to invert it. I have used brush tools to paint over the marked area and dark area to bright. Sometimes I used healing brush tools and clone stamp tools to erase the clothes’ wrinkles and imperfection.

Adjust brush tools
If the above function brings as bright to your photo, you need to reduce the opacity value. It would be best if you chose the mixer brush tools. Then adjust the brush tools and fill the values the same way.
Set the wet to 37%, the load to 37%, the mix to 30%, and flow to 35%.
It would be best if you remembered that the fill above values depend on your image structure, and based on your image, you can change the radius of the above percentage. Now start the work with the brush tools. Paint over the image area that looks ugly and curves as unnatural and a little bit dark. Continue dragging with the brush tools until you get the best output.
If needed, you can create another layer following the way I describe it in the next step. It will help you to get more accurate and quality results and details finishing.
Merge all layers
Now make a group with all layers to combine the works all I have done. Click all layer holding on CTRL and then click CTRL+G to create a group layer.
In adobe photoshop, it is known to merge the layer, and for merging the layer, you need to use shortcut Shift+ CTRL+ALT+E to merge all layers into a group.
That’s all we have done.
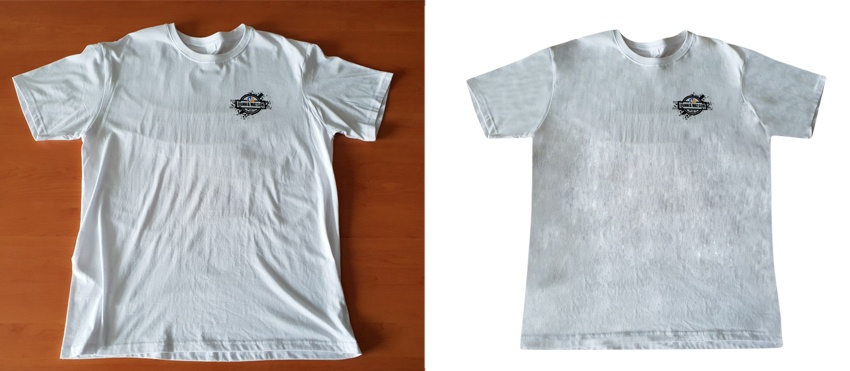
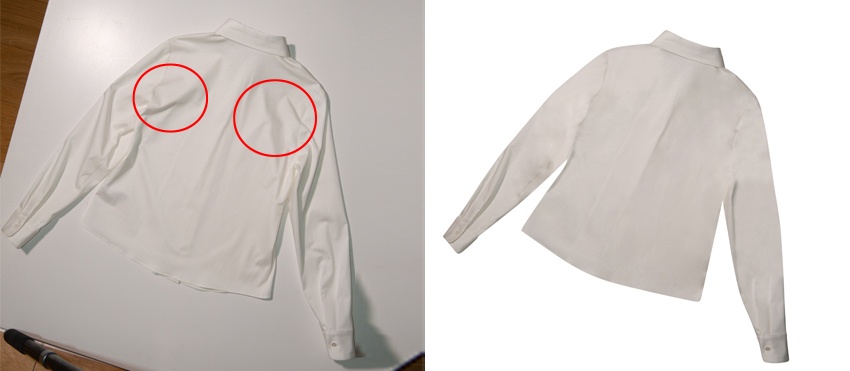
Last, compare with the before photo, and you can see the difference between wrinkles and remove wrinkles photos.
Extra tips you must know.
The starting-level graphics designer may distort the clothing fabrics because they have no basic knowledge of removing wrinkles in photoshop. As a result, the final look of the clothing photo will be destroyed. You should follow the above guideline step by step and apply photoshop advanced process to get the advanced result.
If your clothing will wear by a model, then it’s necessary to retouch the model first and remove wrinkles. Only retouching model photo never brings a good result, so you need to retouch your portrait skin to get the overall result.
Here are some other methods we discuss with you for bringing your products with good result
Color Correction Service
Firstly, you need to learn how to color correct your photo using photoshop. Color correction service helps you light your photo and bring the proper color of your clothing products. Color correction service gets back to you with a perfect result of photo and makes your image alive. On our website, we discuss this to learn is. Alternatively, you can use free photoshop action to apply the short process to make your image ready.
Enhance the portrait eye
Eyes tell minds words, so if your portrait eyes are not looking good, your image is not good to your buyer. How your model photo looks sharp or dull depends on your portrait eyes look. Using photoshop, you can enhance the eyes of the model and make the image unique. So, it is essential to learn how to retouch products and portrait photos using photoshop.
Make clothing photo smooth.
Retouching clothing photo is an exact method to make the product smoother. Using retouching methods, you can wrinkle out any cloth, and it is perfect. To make the image more eye-catching, you need to smooth more your clothing photo that means you should remove dust and spots, scratches, blemish remove and remove unwanted objects from clothing images.

Whiten teeth for portrait photo
If you want to show your image like a Hollywood-style smile for your portrait photo, you should learn about photoshop and know how to make teeth whiten and make smoother your portrait photo. You can remove the yellowish spot from the teeth and make it more whitened. For every portrait photographer, it is essential to know how to make teeth white using photoshop.
Remove flying hairs
The stray hair can disturb portrait photos. Suppose you want to original background for your image and need to remove only flying hairs. You need to remove stray hair from the portrait photo and make a smooth portrait with the background. But there is a way if you want to delete the background from the image. The background removal service and image masking process can help remove unwanted hairs automatically.
Delete unwanted objects from an image
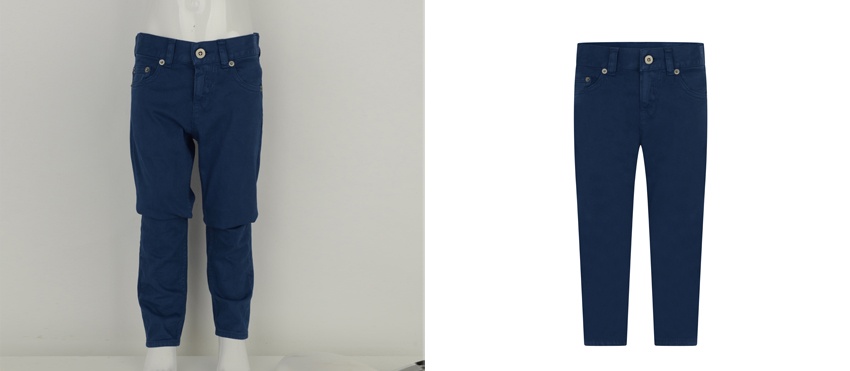
The essential skill you have to learn is removing the background and making the background white. There is always an unnecessary element behind the products, and it can destroy your great background. So, using photoshop service, you can easily make the image background white, transparent, color, or your wanting background.
No one wants to see their background remove an object or white background. Photoshop pen tools are the best tools in photoshop for removing background from an image. You can take a photo background removal service from cutoutway.com to do that job.


