- Have any questions?
- +88 01799-646582
- hello@cutoutway.com
How to make a white background in Photoshop

Remove Background From Image in Photoshop
October 18, 2021
How to Create Drop Shadow in Photoshop
October 22, 2021How to make a white background in Photoshop
Most of the time we want to see our products on a white background or transparent background. The white background image looks awesome and prefers in the marketplaces. Transparent background means having no background. Make a white background in photoshop are need this we are here to ready it for you.
Making white background in photoshop is an easy task for a photo editor. By reading these articles you can easily make pure white background and learn properly actually how to make a white background in photoshop.
Create white background| Why
A white background image is such kind of an image in which an image is set up or replaced by white background from the other background. White background image makes using Photoshop. Not only photoshop but there is so much software you will find in the marketplaces and using that software you can easily remove background from an image and make your image white background.
There has a question you can ask me why do you need to remove background from an image and why do you need this. The question is easy to understand for you if you are a commercial e-commerce fashion photographer or if you have a business online store. Then the photo background removal service must be needed by you.
To replace a perfectly white background and finish your post-production before posting anywhere is a must. Because every customer wants to see the products on a white background and no object image. So, you need to follow the quickest workflow to get that perfect white background for your client.
Over the past couple of years, we’ve experimented with an object and without object products and we see that there have too many demands for which products are on a white background and most of the customers want this type of products. Our experiments are based on quality products with a quality-removing background. Finally, we become a success to provide a successful result that the vote for white background products is 80%, and the other 20% of customers are preferring other backgrounds like a transparent background, Photoshop no background, color background, etc.
How to make a white background in Photoshop | 3 Easiest Way
There are so many processes to remove background from post-production photos. Today I’m going to discuss with you 3 steps. Following these three steps, you can easily remove your image background. Okay, let’s start step by step and know properly how easily you can remove background from an image and make it white.
Using Clipping Path Pen Tools
Clipping path pen tools are an effective way to achieve white background. The process involves mainly around the edge of your product. Cut out the image properly and place your image on a white layer. This method is so effective and essential to clipping white background it saves time especially if you have a large batch of an image, you or your clients. It’s essential this time when one of the images one side blur and another side is sharp. This time clipping path helps you to average your image edge and make it smoother than before. There has no chance of look your image unnatural.
Now I’m going to show you step by step how you remove background from your image by using photoshop pen tools.
Step 1: Open your image with adobe photoshop and start drawing with pen tools. Just click on the “P” button from your keyboard or select it from the left menu bar.
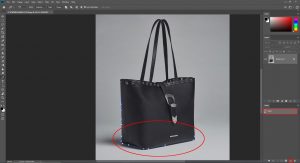
Step 2: Keep it drawing until it’s not finished and remember that you have done it properly.

Step 3: Once you finished the clipping path then just click the path layer hold on the CTRL key or press CTRL+ENTER to select the path.

Step 4: Make feather clicking CTRL+ALT+D or SHIFT+F6.It should be 0.3/0.5, need no more when you make change your background to pure white.

Step 5: Now press CTRL+J to create a new layer and make a blank layer. Select the blank layer and press ALT+BACKSPACE to make your image background white.

You can do it using a solid color and to do this press CTRL+J and select the background layer from the solid color option, you can do this easily.
Step 6: Finally save your image in JPEG format to see the final image.

2. How to Change Background White by using Color Range
This is another and easiest way to make change your background white and now I’m going to discuss it with you. After reading the articles properly you will be able to make white background own. Let’s start
Step 1: Start this process I want to tip you on how carefully before taking a shot of your image. You have to remember this thing before starting the photoshoot and it is so much important. Generally, we recommend placing your background on white before starting. Secondly, make sure the environment was good, and thirdly set your room lighting position properly. Generally, we recommended two white v-flats lights on each side of the product. A lightbox would be also suitable for this.
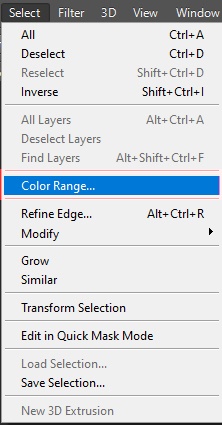
Step 2: Open the image with photoshop in a common format like JPEG, PNG, PSD, and TIFF and select the color range option as I attach it to the photo. Adjust all with your image all function simply click ok button.
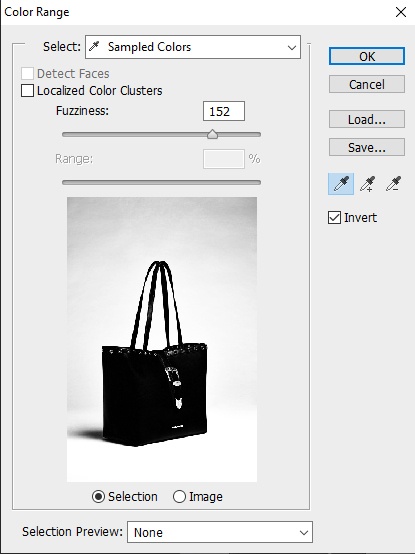
Step 3: After clicking the ok button you will see that there is visible a crawling ant show around your image side. It does not perfect for the first time and to do this properly you need your group layer and click mask to ALT+ Click on the group mask. Now the mask should be visible on your layer.
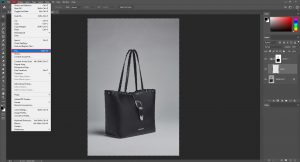
Step 5: This is the critical stage in this step. Now the mask is visible, now we are going to select brush tools and set them to black. From this point, we are going to change our brush size from Normal to Overly. Be sure 100% opacity and 100% flow. This is very so much important when the brush is set to the color black and overly mode. The brush darkens only the dark area of the mask and ignores the white area of the mask. This is the way to separate the subject from the background.
Step 6: After doing this if you are happy with this then create a new layer in the group and go to the Edit>Fill>100% white (#FFFFFF)

Step 7: After finishing the step, you should have perfected the background for your image. If there have still some darker areas around the edge of the image then create a new layer above the group and fill the area with the brush tools.

Step 8: After completing all of the steps finally you will get the final products. If everything checks out okay, congratulations you have a perfectly white background.

3. How to Make white background using the quick selection tool in photoshop CC
Quick selection processes in photoshop. If you have a large batch of images for post-production then you can follow this process to ready your webshop image. Quick selection tools give you a new idea and make your image instant white background. Not only white background rather you can get here transparent background also as usual process. To know how to transparent background photoshop CC read this blog
Now let’s know step by step how to white background using quick selection tools
Step 1: Open the file with adobe photoshop cc
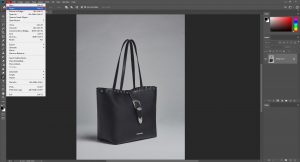
Step 2: Select the magic wand tools from the left toolbar

Step 3: Now press the magic wand tools outside of the image and drag it until it’s not covered up all images and when covering up the full image then stop pressing.

Step 4: Sometimes you will see that there didn’t cover up some area. It can happen don’t worry about this.
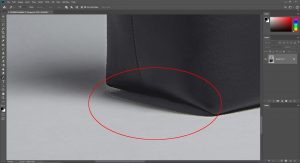
Step 5: To solve the issue you can clipping path of the uncovered area and click CTRL+SHIFT to cover up.
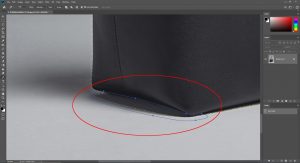
Step 6: After completing covering up the full area create a new layer select the background by pressing CTRL+J
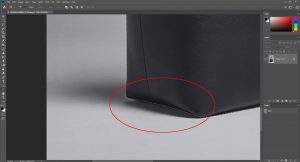
Step 7: In this stage select the solid color as I show in the attached photo under layer-1 and change the image pure white background
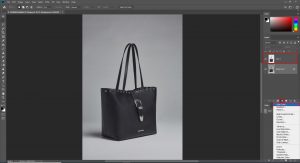
Step 8: Now click ok to attach the solid color
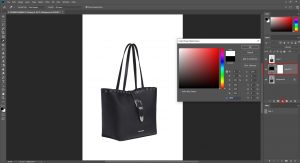
Step 9: Save the final image as JPEG, post it unlimited, sell more and enjoy.

Conclusion:
Hope this tutorial helps you to make white background or color background. Following this method, you can easily remove the white background or add white background. Increasing sales on the online platforms and being happy with your clients.


